Pajero body lift
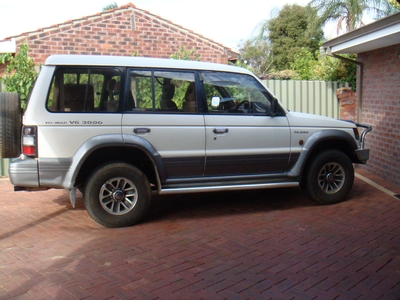
I drive an older Mitsubishi Pajero 4wd. It's a nice old truck, and there has been an awful lot of time and effort gone into making it mechanically reliable.
After its first real off road sortie since a full engine rebuild there was one limitation in relation to its capability - ground clearance. Normally this is not a problem since the vehicles are really surprisingly capable. Just when there are large rocks sometimes there is contact - in my case I added dents to both side-steps. Oops.
There are a number of methods for gaining ground clearance. They fall into 3 main groups:
- Adding clearance between the chassis and the body, known as a body lift,
- Modifying suspension to gain additional clearance, and
- Altering the wheel/tyre combination.
Mine currently has factory 15 inch wheels and road tyres. This is just fine for most of what I do, but when the time to replace tyres comes I will probably save for a set of used 16 inch factory wheels and add some suitable tyres to gain about 50mm rolling radius. There are some advantages to this - cheaper travelling costs (only a little, but every little bit counts!), more ground clearance for relatively little work, and 16x32" tyres are the most widely available tyres in outback Australia so changing to those from a metric size only available in major centres seems to be a good idea.
I don't do enough really hard off road work to justify the cost or effort in altering suspension.
Finally, the body lift gives a little ground clearance, is cheap, and takes only a few hours of time.
Note: you should check with local road authorities about the legality of work. I am based in Western Australia. A conversation with an inspector from the local road transport authorities revealed that a total suspension/body lift not exceeding 50mm does not require certification or inspection.
Note: work like this may also affect insurance. I phoned my insurance company. They wanted to know what work was done, brand of parts, and whether certification had been obtain should it be necessary. If I had spent money on parts then there may have been a slight increase in the value of the vehicle, which would have altered the premium cost.
Body Lift Options
There are a number of kits on the market that make doing a body lift reasonably simple. These fall into two groups; those that completely replace the original rubber bearing and spacers that utilise the original bearing. Each has benefits and drawbacks.
I decided that spacers would give what I wanted - to add height without materially altering the ride characteristics. Spacers come in a range of materials. The most common are aluminium, rubber, polyethylene (like nolathane) and ptfe.
Rubber spacers generally result in a slight softening of ride (they provide additional cushioning effect between chassis rails and bodywork) but are the simplest to install. Polyethylene is more firm but there is still some cushioning effect. I was a little concerned that there would be additional roll or lateral movement as well, but from all reports this is not a concern in practise.
Aluminium provides a nice stable surface to work with, but I was a little concerned about the effects of corrosion. Dissimilar metals in proximity enhances the effect of corrosion, in this case the aluminium spacers may tend to corrode at a quicker rate than the steel components they will be in contact with.
Poly-tetra-flouro-ethylene (PTFE) is inert (will not react with materials it is on contact with), will not absorb moisture and does not deform easily under pressure. So, this sounds like the best bet to me. One of the downsides to PTFE is that it is hard to machine and is nearly impossible to get a perfectly smooth finish. This could cause some chafing on adjacent components, enhancing failure of rubber components and accelerate corrosion of metal components by wearing away paint protection.
What I got
After a bit of waiting about I picked up a set of 25mm PTFE spacers that someone had fabricated but never actually installed for a very appealing price. See good things do come to those who wait! They also came with a bunch of high strength steel bolts : A good start!
I still had some concerns. The first was corrosion. I am not a great fan of rust so I go to reasonable lengths to prevent it. In this case the machined ends of the PTFE spacers were quite rough. Sitting hard against the paintwork on the underside of the body would result in the paint wearing, bare metal then available for corrosion. I was also concerned that the rough surface would have negative effects on the original rubber bearings. So how to overcome this?
There is a trick used by vintage train enthusiasts. There are lots of metal components rubbing together and one way to prevent this from causing problems is to apply grease allowing movement and preventing corrosion. However when pressure is applied to a bearing surface the grease will squish out, losing the positive effect. To prevent the rubbing and keep the grease from squishing out, take a felt pad, impregnate it with grease and put it between the components. The felt can be removed from time to time, refilled with grease and replaced. Simple, cheap, effective. I Like!
The next thing I was not quite so happy about was that the PTFE spacers have a smaller diameter than the rubber bearings. This places extra stress on the centre of the bearing, risking pushing the entire centre right through the chassis mounts - not so cool. To overcome this I decided to add a bearing surface between the rubber bearing and the spacer. As it happens I did a favour for someone who just happened to work for an engineering company. I showed him the problem and what I had been thinking would be a suitable solution. "No problems - I can drop them in to you on Tuesday. How many do you need?"
So now there are 5mm thick steel plates between the spacers and the bearings. These plates are actually stronger than the bodywork of the truck so I was most favourably impressed. Excellent! The total lift is 30mm.
The bolts supplied had a couple of small issues. The first is that the heads are pretty small, adding stress points inside the bodywork. Last thing we want is to have a small crash and the bodywork literally pulling itself off. Also, during the installation process I discovered that some were just too long. This was resolved by a journey to an engineering supply place and getting more suitable bolts, suitable washers (spread stress load) and nyloc nuts (to prevent them coming off at inopportune moments). I'll describe the process as we go :
Tools:
- Jack(s)
- Timber or similar load spreader
- Stands
- Combination spanners
- Socket set (I used � inch drive, needed 17 and 14mm sockets)
- Wobble (or Barrel) bar. A wobble bar is far superior to universal types for this job, mostly because of space constraints in some places.
- Torque wrench.
- Patience. Lots and lots of patience.
Recommended:
- A beautiful assistant
- Air tools (rattle gun)
The first time I did this, I was alone with hand tools. The job took a complete day.
The second time took an afternoon. While this whole job can be done with hand tools, it is significantly quicker if you have access to an air driver. We used air tools on one side, and hand tools on one side. It took nearly 2 hours less time with the air tools. Seriously worth considering.
If you are using the felt pad trick then you will need to make these. The original Pajero bearings are about 75mm across so I made mine just a bit larger. I cut holes through the centre to make installation simpler. Grease was packed in and stored them in a zip-lock bag to prevent sticky stuff getting in where it was not wanted.
The spacer bearings were also made 75mm across with a hole punched through the centre. I spent a little time deburring and ensuring that the plates were properly flat. The centre holes were punched through using a pig, so some had a slight dimple on one side and some had burrs where the plates were cut. A few minutes with a file solved both of these nicely.
The process:
Once you have decided what combination of material to install, and you are happy you have everything you need (well, nearly everything), it's time to bite the bullet.
First you have to find all the mounting points. I have a 1993 NH Pajero wagon with the jump seats in the rear. Your vehicle may have some differences, but is likely to be pretty similar.
Open the bonnet, so that you can check that connections are not strained or damaged during the process. You may have to be aware of fuel and brake lines (front and rear), radiator hoses, plastic shrouds and so on. Just check everything as you go and you should be fine.
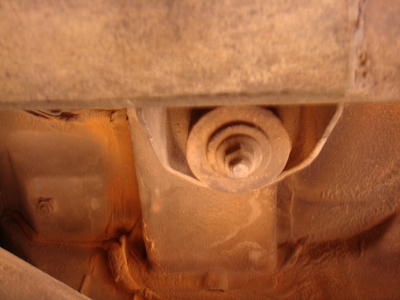
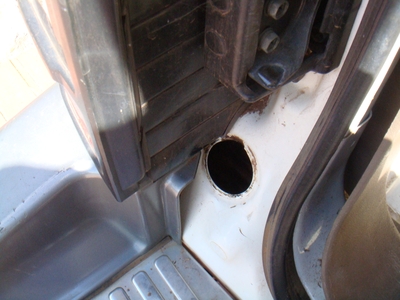
The front mounting points are way the most difficult to get access to. The bolt heads are recessed in a body cross-member that runs under the radiator. The one on the right side is impossible to see at all. The left side bolt is accessed by removing the radiator overflow tank, then removing a piece of silver tape. You will need the wobble bar to get in when tightening the new bolts. Be warned!
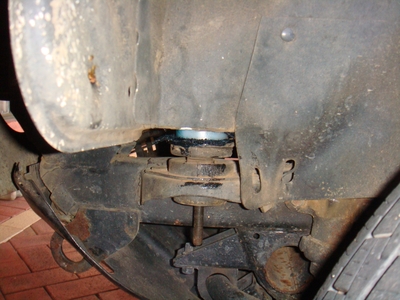
Once you have access to the bolt head you can crawl under and take a look at the nut. Remove the nut and washer. The underside of the front mount bearing is supported by a bracket that will also need to be removed, but it will not actually come out until the body is raised some.
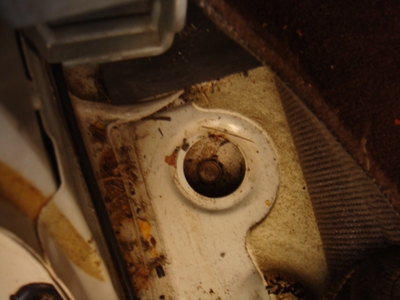
There are mounts in the main cab section. To get to these you have to remove the sill trim and peel the carpet back. One is near the front door pillar (recessed into a body rail), the next one is near the middle pillar just rear of the seat rail (also recessed into a body rail), and the next is in a well under the rear seat (you will need the wobble bar for this one as well).
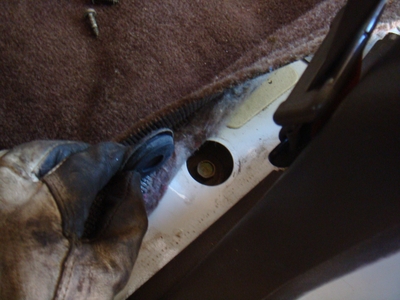
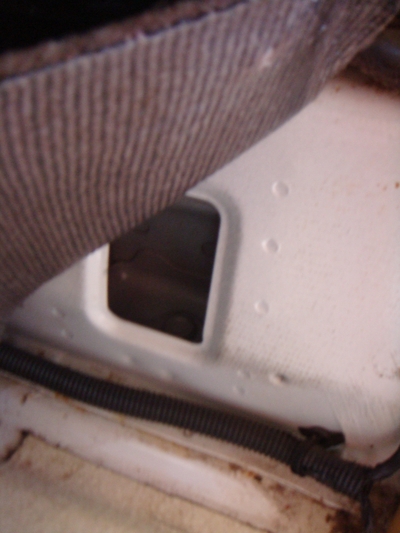
The back has 2 more mounts. The first is just rear of the wheel arch. If you have seat belts for jump seat passengers you will need to remove the lower mount bolt (17mm), then pull back the carpet. It should have a rubber grommet to remove as well. The last one is recessed into the door surround, outside of the door seal. There will be a rubber grommet as well (be sure to put this back correctly, or you will get a surprisingly large amount of dust building up in the body rail later).
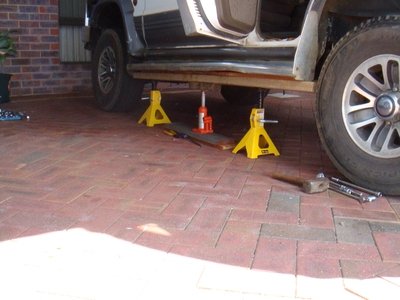
Once all the nuts and lower bush components are removed, you can start to raise the body. I had 2 stands and a bottle jack. I placed the stands more or less where I wanted to support the body, and the jack in the middle. Between the jack and the body I placed a couple of timber lengths to spread the load and minimise risk of damage to the body.
Once the body is raised enough (on the one side) to fit the spacers between the body and bearing then place the stands in a safe location and lower the body from the jack. Safety first after all!

The hardest to remove are the front mounts. The bolts are removed by Braille, and are difficult to remove because of a shaped washer than is pressed into the top. That's great because you don't have to have a socket on there to remove the nut, but it does catch on the rail when you are trying to remove the bolt. The easiest way is to push the bolt up from beneath, while someone at the top guides it out. It is tricky and will try your patience.
Now is a good time to check the length of your new bolts. On the Pajero one of the original fitting bolts is about 25mm longer than the others. If you have the front one out then you can add your spacer height plus maybe 25mm to establish bolt lengths. Easy :
Slip the new bolt and washer(s) partly through. From underneath you will need the felt pad, spacer, felt pad, bearing plate. Once they are all aligned run the bolt down and through the original bearing.
The others are pretty much the same process, just a lot easier access. Remember to use suitable washers where necessary.

Once everything is in place and you are happy with it all, then lower the body, and do the same on the other side.
You will need to torque the lot down. I calculated this to be 30 foot pounds for my application (run from the bolt head not the nyloc). It is quickest and easiest to run them close to the mark by using the air tool on the bolt head and hold the nut with a ring spanner. Finally check torque using a torque wrench.
The front mounts originally had a silver tape over the hole preventing dust and stuff getting in to the cross member. I replaced this with duct tape, the end folded to make any future access just that little bit simpler.
All done!
Am I happy with the result? Yup. The ride feels no different from inside the truck. There is more vision (even such a small height change makes a difference!) and that amount of clearance should help with future projects, like secondary fuel tanks and so on. And plenty of clearance for larger wheels and tyres later. Excellent!